One of the first things you will want to do with your Buildbotics CNC controller is connect it to your network. For many people, this means connecting to WiFi. To do so you must configure the controller's WiFi settings.
There are two ways to access the controller's WiFi settings. Either temporarily connect the controller to a wired network or boot the controller with a monitor, mouse and keyboard connected. Each of these methods is described in detail below.
Method 1: Using a wired network
If you plug the Buildbotics controller directly into a wired network, the network should automatically assign the controller an IP address. You can then use that IP address to access the controller from another computer on the same network. Here's how:
- Plug in the controller's power supply.
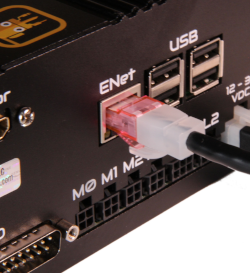
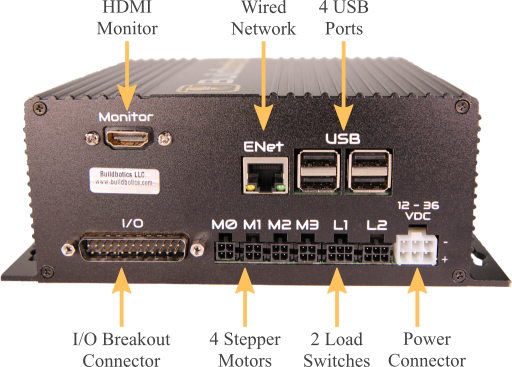
- Plug an Ethernet cable in to the back of the controller
- Plug the other end of the Ethernet cable in to your router or network wall socket.
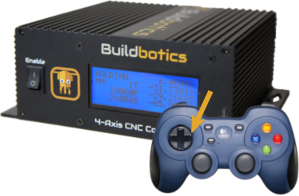
- Plug the Gamepad into one of the controller's USB ports.
- Switch the controller on.
- Wait for it to boot.
- Press the right arrow on the Gamepad until you see the network page on the LCD screen.
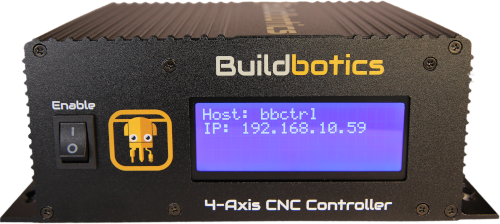
8. On another computer navigate to http:// followed by the IP address shown on the LCD screen.
For example, you might enter http://192.168.0.2 in your browser. Once you've reached the Buildbotics controller's Web interface, you can move on to configuring the WiFi.
Method 2: Connect a Monitor, Mouse and Keyboard
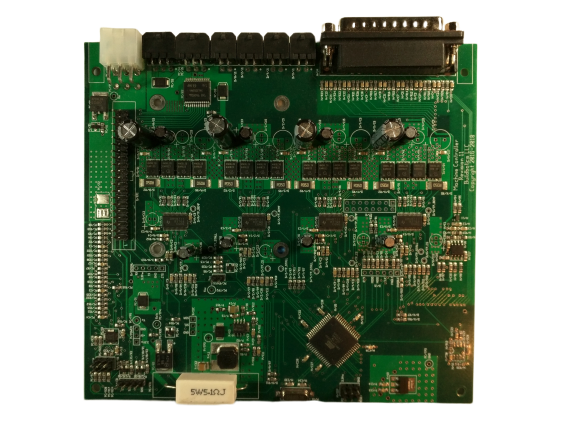
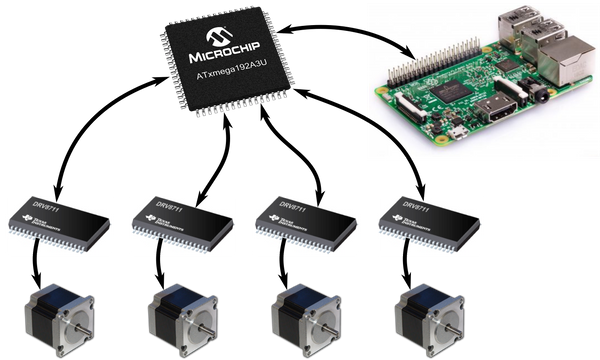
The Buildbotics controller has a built-in computer which you can use to control your CNC directly. You will need the following:
- A monitor with HDMI cable.
- A USB mouse.
- A USB keyboard.
If your monitor is a touch screen you may be able to forgo the mouse and keyboard.
Connect the monitor, mouse, keyboard and the controller's power supply. Turn the controller on and wait for it to boot. As it starts up you should see the Buildbotics logo. Once it is fully booted you can move on to configuring the WiFi.
Configuring the WiFi
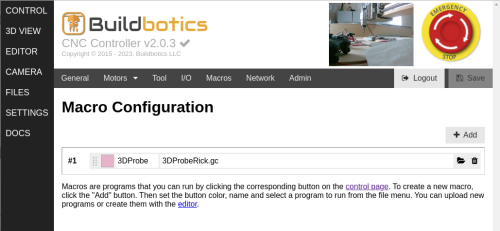
Once you've gained access to the controller's Web interface using one of the methods described above you are ready to configure the WiFi settings.
To setup the WiFi:
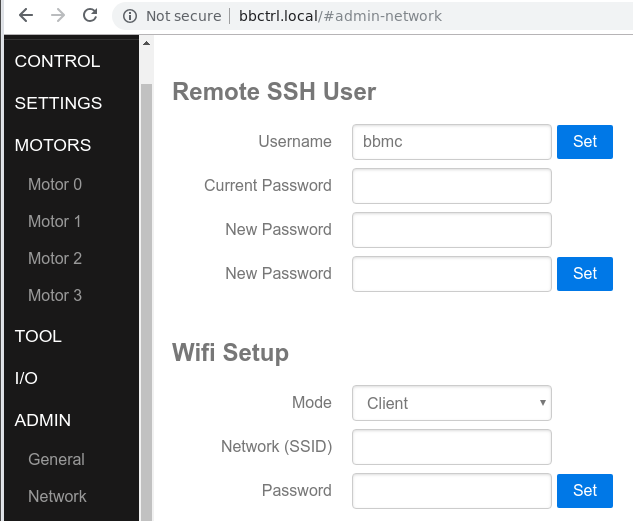
- Click on the ADMIN -> General tab from the menu on the left.
- Set the WiFi mode to Client.
- Set your WiFi network's SSID or name.
- Set your WiFi network's password.
- Click the blue Set button.
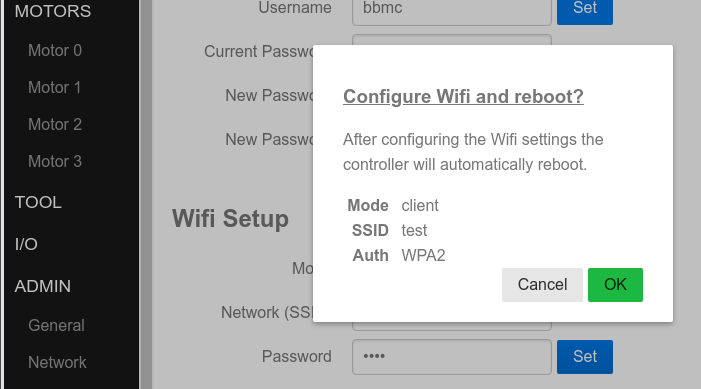
- Click the green Ok button to reboot the controller.
- Wait for it to fully reboot.
Accessing the Buildbotics controller over WiFi
Once you've saved the controller's WiFi settings and allowed it to reboot you should be able to access the controller over WiFi. If you used a wired network to configure the controller, you should unplug the Ethernet cable now.
As described in method 1 above, use the Gamepad to locate the new IP address on the LCD screen. It will be different from the wired network IP. Enter http:// followed by the IP in another computer on the network to access the controller remotely.
Troubleshooting
Here are some common problems and their solutions. Please feel free to contact us if you cannot resolve your problem.
Problem: Network connects and disconnects.
The Buildbotics controller's built-in WiFi is not particularly strong. If your WiFi network's signal is weak or there are a lot of other wireless devices in the area it may be difficult to keep the controller connected. A wired network connection will be more reliable but if you must use WiFi you can add a USB WiFi dongle with an antenna to boost your signal strength. There are many good inexpensive WiFi adapters available online.
Problem: No IP address on the LCD screen.
First make sure you are on the LCD screens network page by pressing the right arrow on the Gamepad. If the screen does not change, make sure the Gamepad is plugged in and you are pressing the right button.
If there is no IP address on the Buildbotics LCD screen on its network page, then it is either not connected to a network or the network is not assigning the controller an IP address. Check the network connections or the WiFi settings. It that fails, check your local network's configuration.
Problem: The IP address will not load in the browser
Make sure you type a full address such as http://192.168.0.2 If it still does not work, then the computer you are using may not be on the same network as the Buildbotics controller. The remote computer must be on the same network.
Problem: The controller shows more than one IP address
Your controller may get assigned more than one IP address if it is connected both to the WiFi and to a wired network. This may also occur if you are using a WiFi dongle to boost your signal. You can disconnect the other networks and restart the controller or try each IP address until one works.