Here's how to use an SSR or Solid State Relay to control loads like vacuum tables, coolant pumps, heated 3D printing beds, dust collection systems and much more.
Note, an SSR only works with single-phase AC (Alternating Current) loads and will not switch DC (Direct Current) loads. DC loads can be switched directly with the Buildbotics controller's built-in DC load switches.
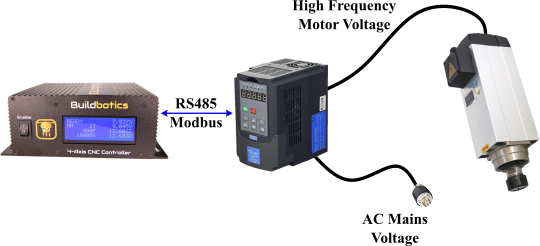
A small low current DC voltage control signal from a microcontroller or CNC controller can be use to control a much larger high current high voltage AC load using an SSR or Solid State Relay. This is handy for controlling vacuum tables, coolant pumps, heated 3D printing beds, dust collection and much more with GCode commands.
Inexpensive SSR devices with input voltages in the 3-32VDC (4-20mA) range can be found on Amazon or at Sparkfun.
Safety
It is your responsibility to follow proper electrical safety procedures. If you are at all unsure, consult a professional. Please also see our disclaimer.
SSR selection
To select an appropriate SSR for the job check that all of the following specs are with in range.
- AC voltage range includes the load voltage.
- Maximum AC current is at least 20% greater than the current draw of the load.
- DC control voltage range includes the output voltage of your control signal.
- Minimum DC control current is less than the current the controller can supply.
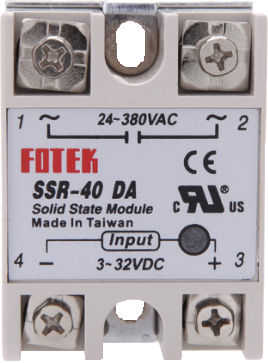
For example, if you wish to switch a 115V 6.5A AC vacuum pump using the Buildbotics controller the SSR-40 DA would be a good choice. It has a load voltage range of 24-380VAC which includes 115VAC, a maximum load current of 40A and only requires a 3VDC control voltage with a minimum drive current of 4mA. The Buildbotics controller output is 5V at up to 25mA.
SSR Temperature
If you are driving large currents that cause the SSR to heat up, you may need to attach a heatsink or bolt the SSR to a large piece of metal and use heatsink compound. This is not necessary if the SSR stays cool under typical operating conditions.
Startup current
A word of warning, some AC loads can have very high startup currents that greatly exceed their normal running current. The SSR must be chosen so that it can handle the startup current. Check the devices datasheet to make sure it is well within the SSRs limits.
SSR Connection
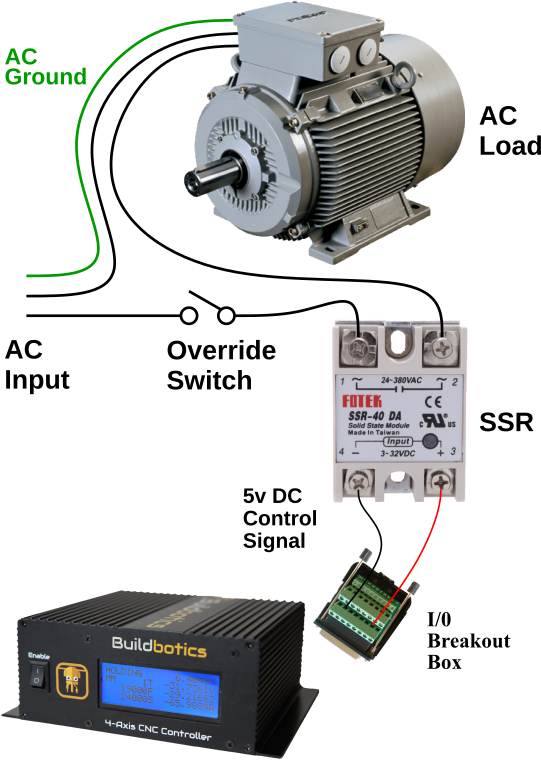
Connect one side of the single phase AC input to the AC side of the SSR's screw terminals. It does not matter which AC wire is switched as long as it's not the AC ground wire. Then connect the DC side to the controller making sure to connect the negative side - of the SSR to ground and the positive + side to the output signal line.
Using an SSR with the Buildbotics CNC Controller
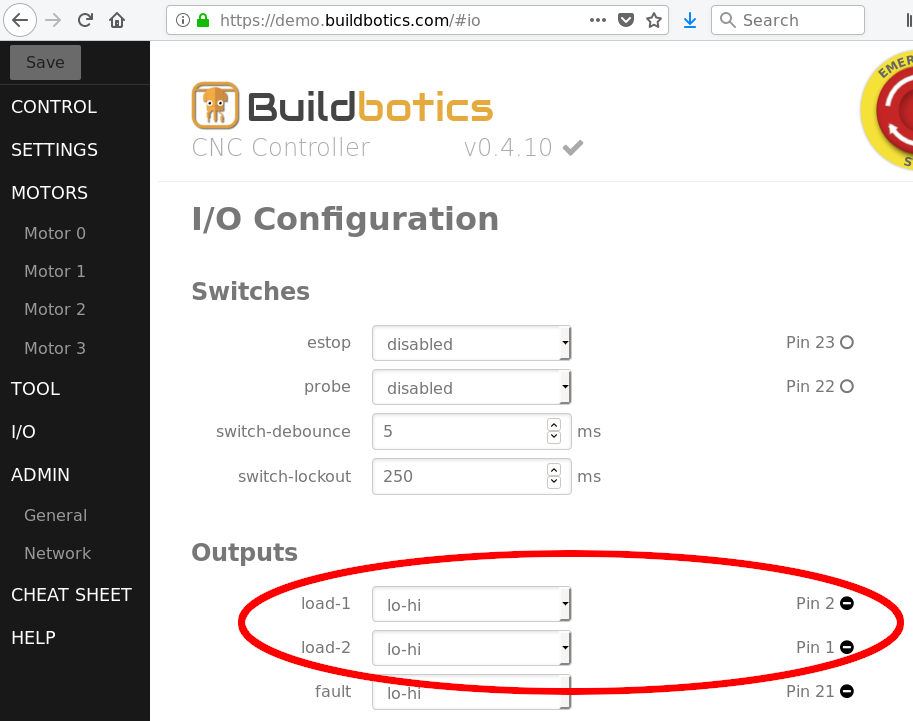
On the Buildbotics controller I/O pins 1 (flood) or 2 (mist) can be used to control loads with GCode mist coolant (M7, M9) and flood coolant (M8, M9) commands. The load being switched could be a vacuum table, coolant pump or any other appropriate AC load.
For example, to enable load 1 (pin 2), enter the following GCode:
M7
Turn it off with:
M9
Alternatively, the tool enable line (pin 15) can be used. In this case, M3 (clockwise rotation) and M4 (counterclockwise) GCode commands along with a non-zero S value enable the tool and M5 disables it.
To enable the tool output, enter:
M3 S1
To disable the tool output, enter:
M5
In all cases, configure the Buildbotics controller I/O output to "lo-hi" mode so that it outputs 5v when enabled.
See the I/O Breakout page for more information on the Buildbotics CNC controller I/O pin-out.