Introduction
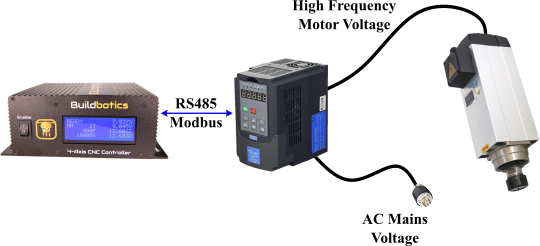
This article describes how I set up a rotary axis on my homemade CNC machine. This article describes the setup using my Buildbotics CNC Controller, but the concepts should be applicable to most other CNC controllers.
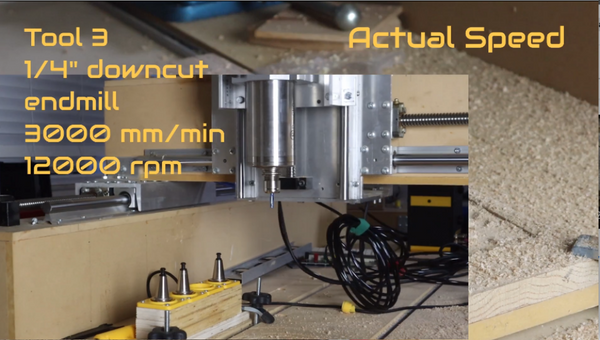
Check out my youtube video that shows my first cut with this rotary axis.
Setting up the hardware
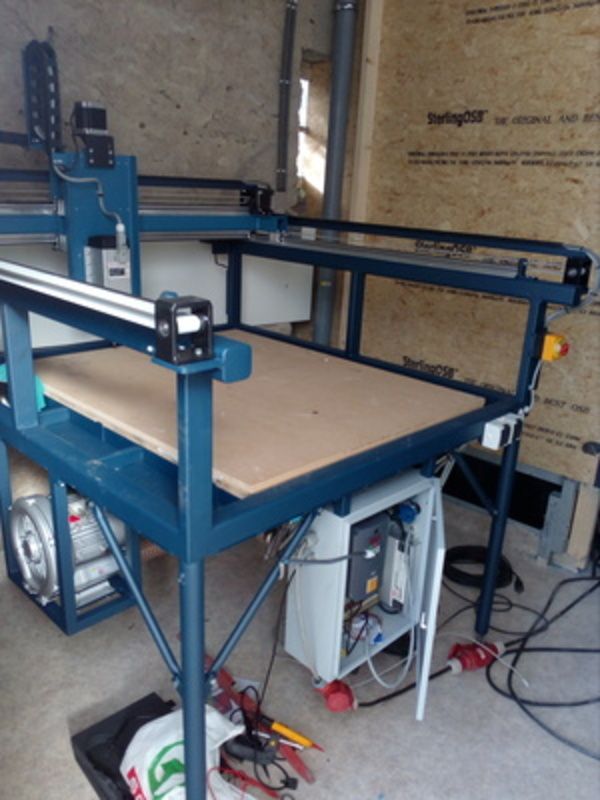
When I built my CNC Machine, I set up the Z axis with 10 inches of movement. I eventually wanted to add a rotary axis and figured I needed this extra space so I could place the rotary hardware on the table and raise Z high enough to get the spindle over the work piece.
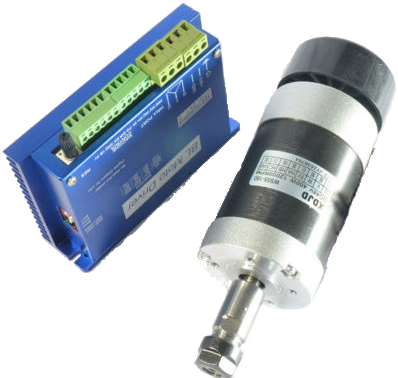
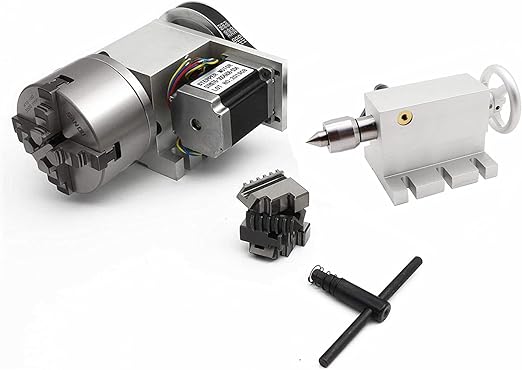
Then, I bought this rotary axis set off of Amazon. It came with a 100 mm, 4-jaw chuck.
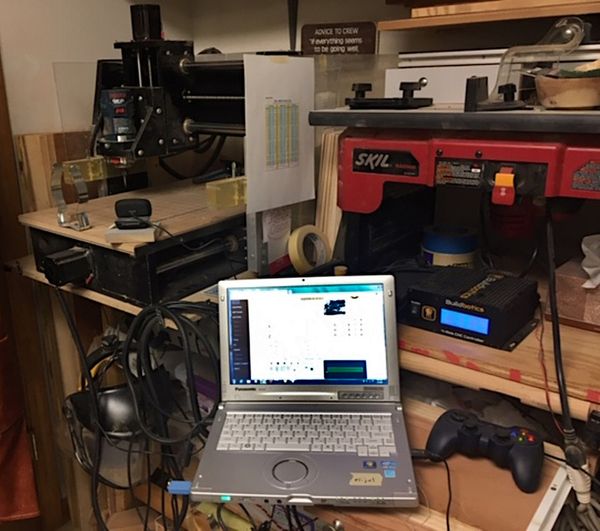
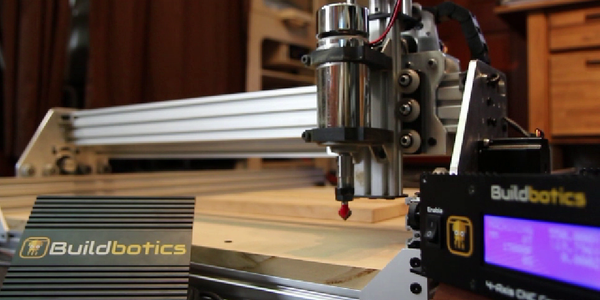
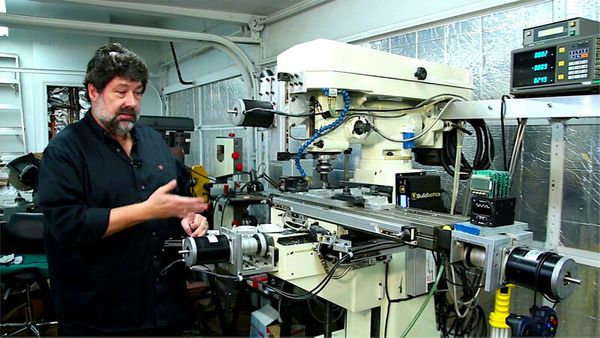
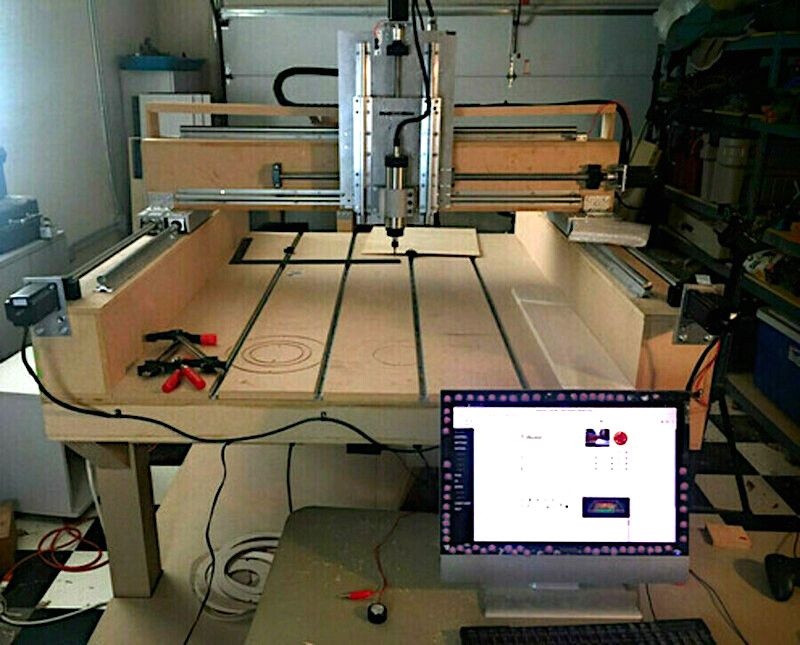
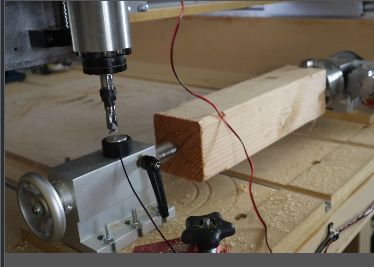
I finally got around to setting it up on my machine, and here's the result.
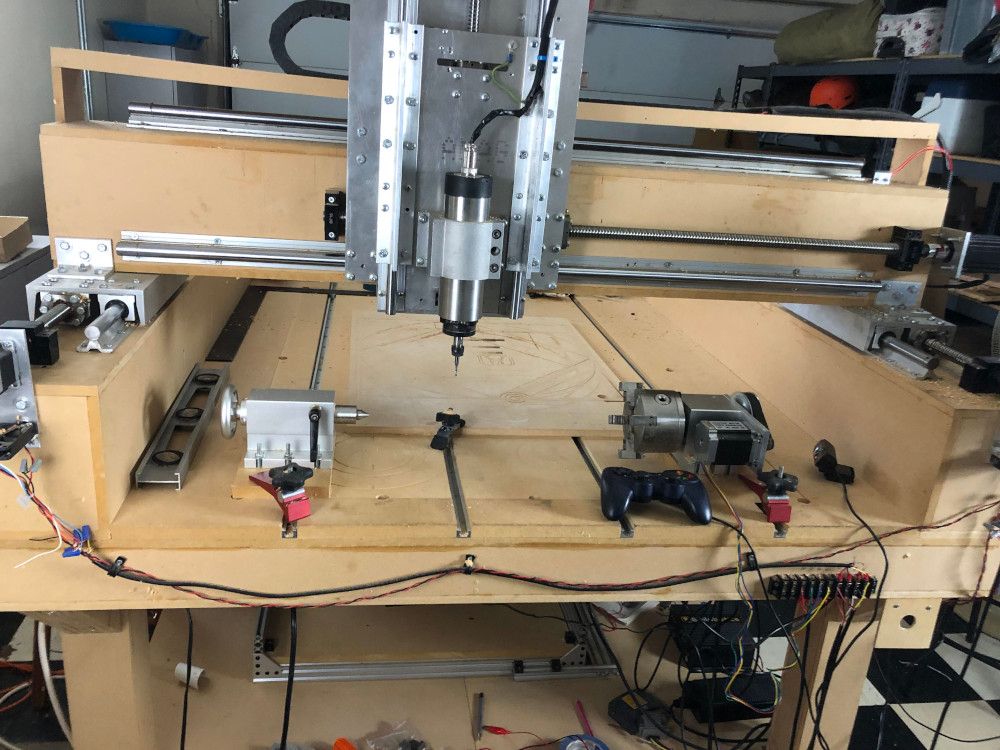
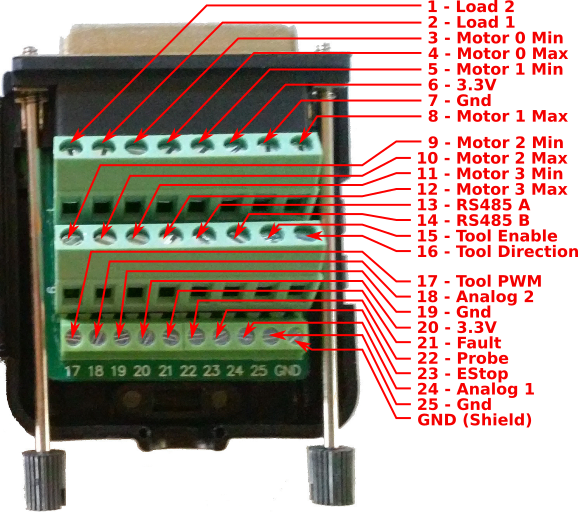
The hardware set up was pretty easy. I rewired the Y-axis motors in parallel and connected them to the Motor port 1. This freed up Motor port 3 so I could assign it to the A axis for rotary motion. I had to reduce the top speed on my Y axis a bit to prevent stalling, but rapid moves are still 300 inches per minute.
Configuring the rotary axis
Configuring the rotary axis was a bit more difficult. The axis had to be configured for linear movement in either millimeters or inches, but the axis actually turned. I figured that I needed to calibrate such that a move given in millimeters would actually travel that far in degrees.
The rotary hardware actually turns the chuck one revolution for every six revolutions of the motor. So, I reasoned that if I set the travel-per-revolution to 60 mm, it would work. And it did! Now, I could give it a command like "G0A90" and the chuck would turn by 90 degrees.
Unfortunately, this setup had two major problems:
- Switching to Imperial units caused the turning distances to be off by a factor of 25.4. For instance, a command like "G0A360" would cause the chuck to turn by 25.4 revolutions. This meant that I would have to reconfigure the axis everytime I switched between Metric and Imperial units.
- The feed rates are based on linear travel distance, but the rotary axis traveled in degrees. As a result, the feed rates were incorrect unless the cutting point was exactly 57.3 mm from the center of rotation
A better solution is to treat the axis as if it were a linear axis and set a 'sensible' travel distance for one revolution of the motor. This method provides the correct cutting distance as long as the cutting point is at a specific distance from the center of rotation. Here's how I did it:
- I decided that the travel distance for one rotation of the chuck would be 10 inches.
- Since the motor rotates six times for each rotation of the chuck, the travel-per-revoltion would be 10 / 6 = 1.667 inches.
- I like to configure my machine in metric units so I converted 1.667 inches to 42.33 mm and entered that value into the travel-per-rev field on the Settings->Motor page for my rotary axis.

This distance is correct as long as the cutting point is 1.59 inches from the center of rotation. If the cutting point moves in or out significantly from 1.59 inches, the cutting speed may be off far enough to negatively impact the quality of the cut.
You may want to change the feed rate in your gcode program to compensate for this problem, but be careful because changing the feed rate changes the cutting speed along both axes while the distances are only changing along the rotary axis.
If your CAD software is sophisticated enough, it may be able to calculate and adjust the feed rate for each line segment so that a constant cutting speed is maintained.
In the worst case, you may need to break your project into separate cuts and adjust the travel-per-revolution of the rotary axis between those cuts.
Setting up the origin
In reality, I could move the rotary axis around on my machine, but it is kind of a pain to set it up and move it around. Once I found a good spot, I made some adjustments in the configuration that allow me to set offsets for my cutting origin and then go there at the beginning of each cut.
This works great as long as the machine is homed before you start your program.
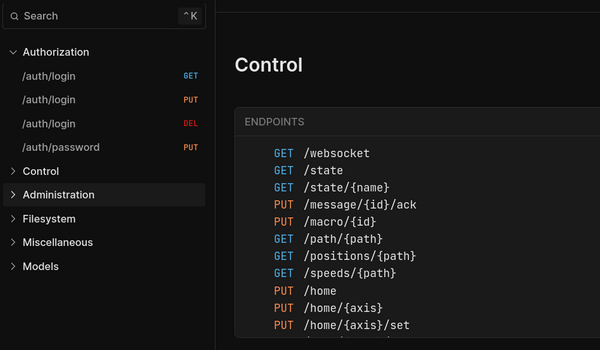
On the Buildbotics Controller, this is done in the "program-start" textbox on the "SETTINGS->General" page.
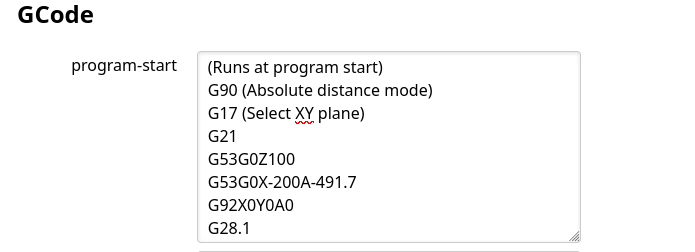
The "G53G0Z100" command tells the machine to ignore existing offsets and move in machine coordinates while raising the Z axis to 100 mm.
The "G53G0X-200A-491" tells the machine to use machine coordinates and move to X=-200mm and A=-491.7 mm. Note that A is actually my linear axis that moves the gantry forward and backward on my machine. The rotary axis is Y. This move puts the tool directly above the center and near the left end of the work piece.
The "G92X0Y0A0" command tells the machine that the current location is the origin for the X, Y, and A axes.
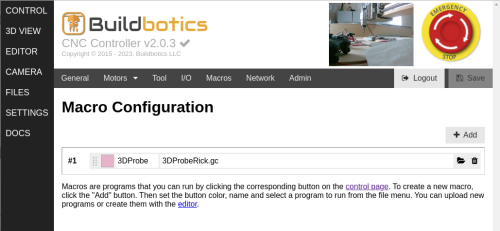
Setting up Z-Axis probing
If you want to change tools during a cut, you will need the ability to probe to adjust the Z-axis offset for each tool that you use.
Probing is set up in the "tool-change" textbox on the "SETTINGS->General" page.
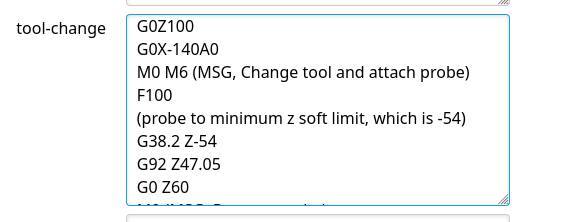
This picture shows the part of the tool change procedure that is automatically inserted into the gcode program every time a tool change is encountered.
The "G0Z100" command tells the Z-axis to move to 100mm to ensure a safe move to the probing location.
The "G0X-140A0" moves the tool to a place directly above the tail-stock housing.
The "G38.2 Z-54" command tells the controller to move down along the Z axis until the probe is tripped or it reaches the minimum soft limit at -54mm.
After the probe is tripped, the "G92 Z47.05" sets the Z axis to 47.05mm.
The Z axis is set to 47.05 mm because the top of the tail-stock housing is 28 mm above the center of rotation and the probe is 19.05 mm (.75 inches) high. 28 + 19.05 = 47.05 mm.
Check out this thread on the Buldbotics Forum for more information on probing.